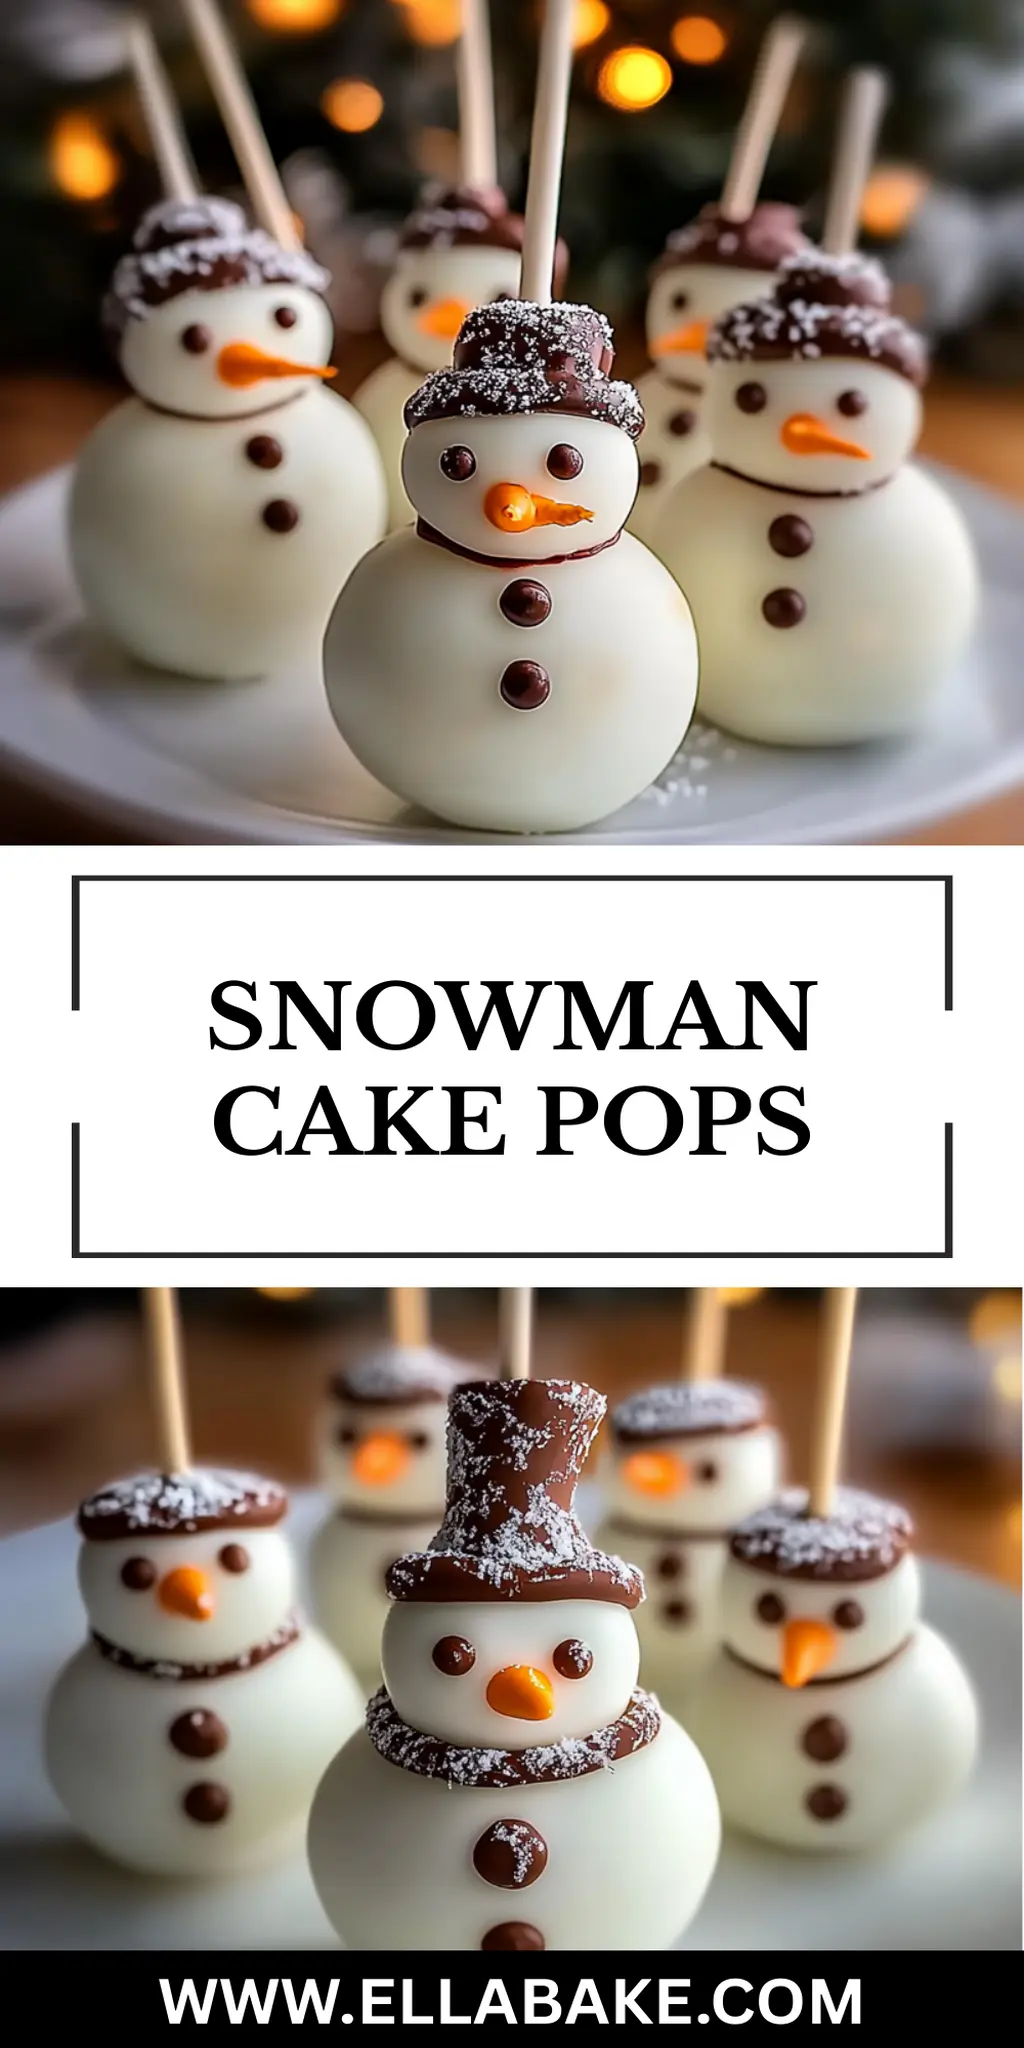
There’s a special joy that comes with making treats that light up eyes and spark smiles, especially during the chilly months. Recently, I found myself perched at my kitchen counter, basking in the glow of holiday spirit, and that’s when I decided to whip up a batch of Snowman Cake Pops. The idea came from my desire to create sweet memories—a fun and festive way to bring cheer to my family while avoiding the usual hustle of store-bought options.

Imagine the delight on your loved ones’ faces as they take a bite of these adorable little snowmen, with their crisp candy coating and rich cake centers. What I love most about these cake pops is their versatility; you can decorate them however you please, turning each one into a true work of art! Plus, they’re easy enough for even the busiest home cook. So gather your ingredients, and let’s bring some frosty fun into your kitchen with this delightful recipe!
Why You'll Love This Snowman Cake Pops
- These Snowman Cake Pops are incredibly easy to make, allowing you to whip them up in no time even during the busiest holiday season.
- The delightful combination of moist cake and a crisp candy coating creates a flavor explosion that will leave everyone craving more.
- Their versatility shines through as you can customize the decorations to fit any theme or occasion, making them suitable for family gatherings, school parties, or festive celebrations.
- Not only are they visually appealing, but they are also a guaranteed crowd-pleaser that will bring joy to everyone who tries them.
Snowman Cake Pops Ingredients
• Get ready for holiday fun with these delightful treats!
For the Cake Base
- Cake mix – A box of your favorite cake mix saves time and effort.
- Large eggs – Two eggs keep the cake pops moist and fluffy.
For the Frosting Mixture
- Frosting – Use a cup of frosting to bind the cake crumbs; feel free to pick any flavor you love for a personal touch!
For the Coating
- Candy melts – One bag of candy melts adds that signature festive crunch; white chocolate works beautifully for a snowman look.
For Assembly
- Lollipop sticks – Twelve lollipop sticks hold your cake pops together; they make decorating easy and fun!
- Decorations – One cup of decorations like sprinkles or edible eyes makes each snowman uniquely yours.
Dive into this merry project and make your Snowman Cake Pops a holiday tradition that your family will cherish!
How to Make Snowman Cake Pops
-
Prepare the cake mix according to package instructions. Let it cool completely on a wire rack to ensure perfect texture for your cake pops.
-
Crumble the cooled cake in a large bowl until it resembles fine crumbs. This will create a delightful base for your cake pops.
-
Mix in about a cup of frosting with the cake crumbs using your hands. Aim for a moist consistency that holds together without being overly sticky.
-
Roll the mixture into small balls, shaping a larger bottom ball and a smaller one for the head. This will give your snowmen their adorable, classic look.
-
Insert the lollipop sticks into the balls gently to hold them together. This step is crucial for the cake pops’ structure, so be careful!
-
Chill the cake pops in the fridge for about 30 minutes, or until firm. This makes the coating process much easier and neater!
-
Melt the candy melts in the microwave according to package instructions. Stir until you have a smooth and velvety consistency for coating.
-
Dip each cake pop into the melted candy coating carefully, allowing the excess to drip off. This creates that beautiful glossy finish!
-
Decorate quickly with your chosen toppings before the coating sets. Get creative with sprinkles, chocolate chips, or candy eyes for maximum cheer!
-
Place the finished cake pops in a styrofoam block or a piece of cardboard to stand upright while they set completely. This ensures they keep their shape perfectly!
Optional: Sprinkle extra decorations on top while the coating is still wet for added flair.
Exact quantities are listed in the recipe card below.
What to Serve with Snowman Cake Pops?
Cozy up the holiday season with delightful treats that bring smiles and warmth to your gatherings.
- Hot Chocolate Station: A rich and creamy hot chocolate pairs beautifully with the sweetness of the cake pops, creating a festive drink option.
- Gingerbread Cookies: The spiced flavor of gingerbread adds a classic, warm element alongside your sugary snowmen, making for a nostalgic holiday pairing.
- Fruit Skewers: Bright, fresh fruit adds a pop of color and a refreshing contrast to the rich cake pops, maintaining a balanced dessert table.
- Spiced Apple Cider: This warm beverage complements the sweet flavors of the cake pops, enhancing the cozy atmosphere for your holiday festivities.
- Mini Cupcakes: Offer a variety of mini cupcakes that mirror the flavors of your cake pops, allowing guests to indulge in more delicious bites.
- Cheese Platter: The savory notes from a well-curated cheese platter provide a sophisticated contrast, making your dessert experience truly memorable.
- Pecan Pie Bars: Sweet and nutty pecan pie bars can elevate your dessert spread, delighting both adults and kids with every tasty bite.
Snowman Cake Pops Variations
Feel free to let your creativity shine with these delightful twists on your Snowman Cake Pops!
-
Gluten-Free: Use a gluten-free cake mix to accommodate those with dietary restrictions while still enjoying the festive fun.
-
Chocolate Lover: Swap the white candy melts for chocolate candy melts for a rich and decadent flavor. A melt-in-your-mouth treat that chocolate fans will adore!
-
Nutty Addition: Add crushed nuts or nut butter to the frosting mixture for a delightful crunch. Just imagine that extra layer of texture adding to your snowman treats!
-
Vegetarian: Replace the eggs with a flaxseed meal mixed with water for a plant-based base, allowing everyone to enjoy these sweet figures without compromise.
-
Mini Snowmen: Roll out smaller cake pops for a tray of mini snowmen! Their cute size will make them irresistible during holidays and gatherings, enchanting both kids and adults alike.
-
Fruit Twist: Incorporate some zest by adding dried fruit like cranberries or cherries to the cake mix. This fruity flavor will surprise and delight everyone at your party!
-
Spicy Kick: Introduce a hint of cinnamon or nutmeg to the cake mixture for a warm spiced flavor. It’s a cozy nod to winter that will have everyone asking for more.
-
Holiday Colors: Use colored candy melts to create rainbow variations of these cake pops. Add a splash of red or green for a festive twist that brightens up any dessert table!
How to Store and Freeze Snowman Cake Pops
Room Temperature: Store your Snowman Cake Pops in an airtight container for up to 2 days at room temperature to maintain their freshness and flavor.
Fridge: If you need to keep them longer, place the cake pops in the refrigerator for up to a week. Make sure they are wrapped properly to prevent drying out.
Freezer: You can freeze the cake pops for up to 3 months. Flash freeze them first on a baking sheet before transferring to a freezer-safe bag or container to keep them from sticking together.
Reheating: When ready to enjoy, simply thaw in the fridge overnight. Avoid reheating as it may alter the texture of the candy coating.
Make Ahead Options
These Snowman Cake Pops are perfect for busy home cooks looking to save time during the festive season! You can prepare the cake base and roll the cake pop balls up to 24 hours in advance, just be sure to refrigerate them to maintain their shape and moisture. Once you’re ready to serve, simply insert the lollipop sticks, chill again for a quick 30 minutes, and then dip them in melted candy melts. To ensure they taste just as delightful, keep any decorated cake pops in an airtight container for up to 3 days. Get ahead of the holiday rush, and enjoy delicious homemade treats with minimal effort!
Chef's Helpful Tips
- When making Snowman Cake Pops, ensure that your cake is completely cool before crumbling to achieve the right texture.
- Be mindful not to add too much frosting; the mixture should be moist enough to hold together without being too sticky.
- For the best coating results, use a microwave-safe bowl and melt the candy melts in intervals, stirring in between until smooth.
- Remember to chill your cake pops for at least 30 minutes to firm them up, making dipping and decorating much easier and neater.
Snowman Cake Pops Recipe FAQs
How do I select the best cake mix for my Snowman Cake Pops?
Absolutely! When choosing your cake mix, opt for a flavor you love—classic vanilla or rich chocolate both work wonderfully. Check the expiration date to ensure freshness, and avoid any mixes with dark spots or bulging packaging, which can indicate spoilage.
What’s the best way to store leftover Snowman Cake Pops?
Very! You can store your Snowman Cake Pops in an airtight container at room temperature for up to 2 days. If you want them to last longer, refrigerate them for up to a week, ensuring they are well wrapped to keep moisture in and maintain their flavor.
Can I freeze my Snowman Cake Pops for later?
Absolutely! To freeze, first flash freeze the cake pops on a baking sheet for about 1 hour until firm. Then, transfer them to a freezer-safe bag or container where they can stay good for up to 3 months. When you’re ready to enjoy them, just thaw them in the fridge overnight for the best texture!
What should I do if my cake pops are falling apart?
No worries! If your cake pops are crumbling, it may be due to not enough frosting or insufficient chilling time. Make sure to add a bit more frosting to help bind the mixture—start with a tablespoon at a time. Additionally, chilling the balls for at least 30 minutes in the fridge is key to firming them up, making dipping easier.
Are Snowman Cake Pops safe for pets or allergies?
Very! Be cautious with the decorations and coatings, as chocolate is toxic to dogs and cats. Ensure your frosting and candy melts do not contain any ingredients that your guests may be allergic to—such as nuts or gluten—by checking product labels. For a safe option, consider using allergen-friendly sprinkles and a gluten-free cake mix!
How do I keep my candy coating smooth and shiny?
Absolutely! Melt your candy melts carefully in a microwave-safe bowl, making sure to stir in 30-second intervals to prevent overheating. Once melted, adding a teaspoon of vegetable oil can create a smoother, shinier coating. It’s best to dip the pops while the coating is still warm—you’ll get that flawless, professional-looking finish!
Snowman Cake Pops
Ingredients
Equipment
Method
- Prepare the cake mix according to package instructions. Let it cool completely on a wire rack.
- Crumble the cooled cake in a large bowl until it resembles fine crumbs.
- Mix in about a cup of frosting with the cake crumbs using your hands.
- Roll the mixture into small balls, shaping a larger bottom ball and a smaller one for the head.
- Insert the lollipop sticks into the balls gently to hold them together.
- Chill the cake pops in the fridge for about 30 minutes, or until firm.
- Melt the candy melts in the microwave according to package instructions.
- Dip each cake pop into the melted candy coating carefully.
- Decorate quickly with your chosen toppings before the coating sets.
- Place the finished cake pops in a styrofoam block or a piece of cardboard to stand upright.
Leave a Comment