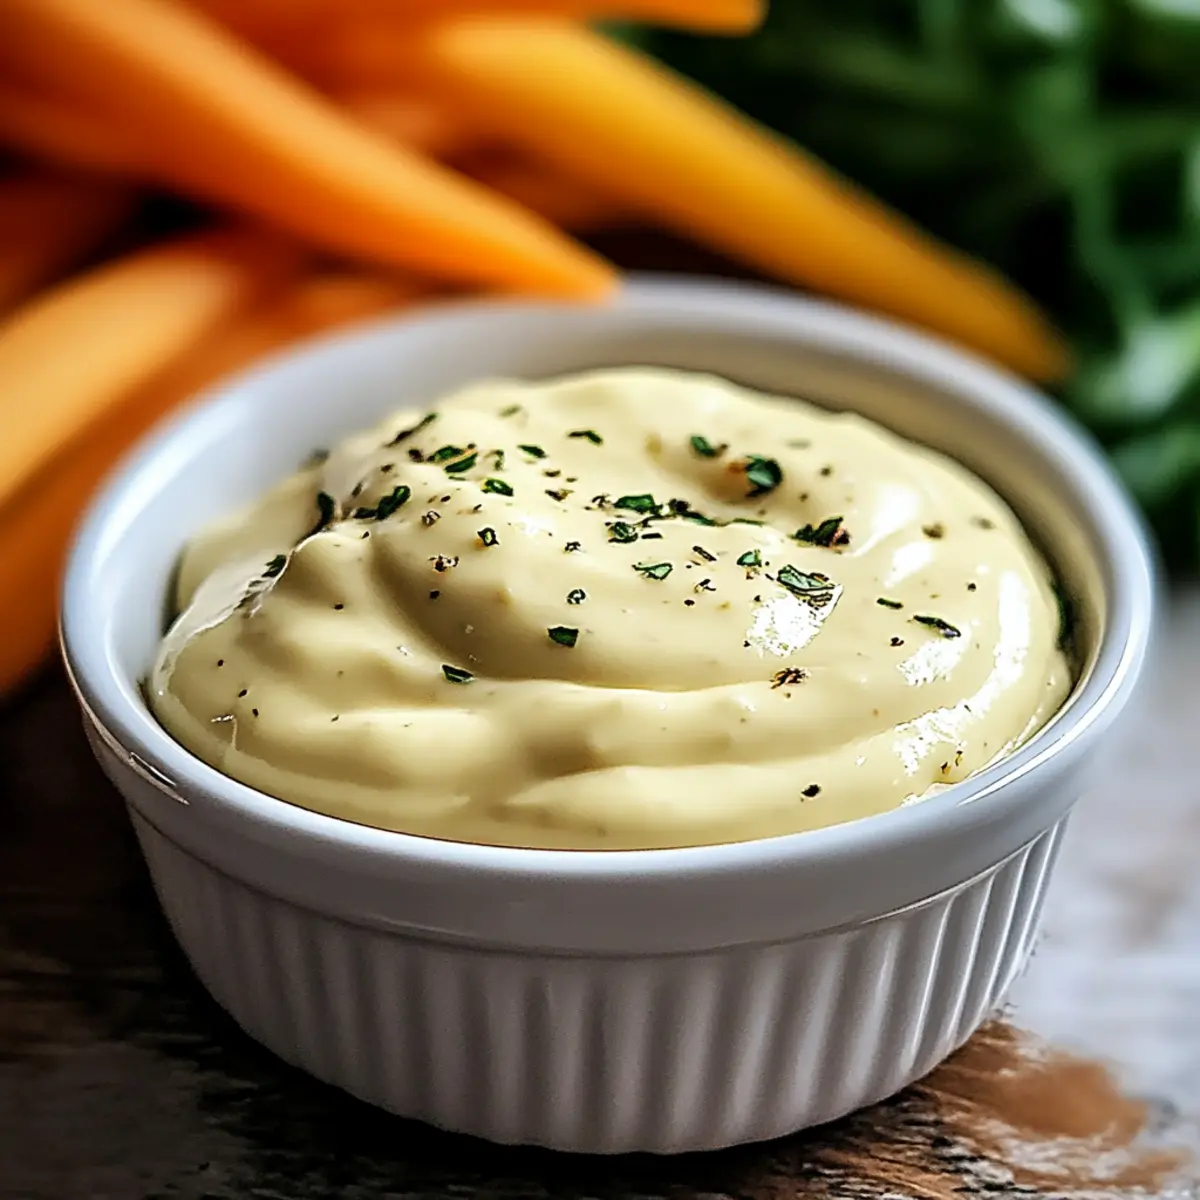
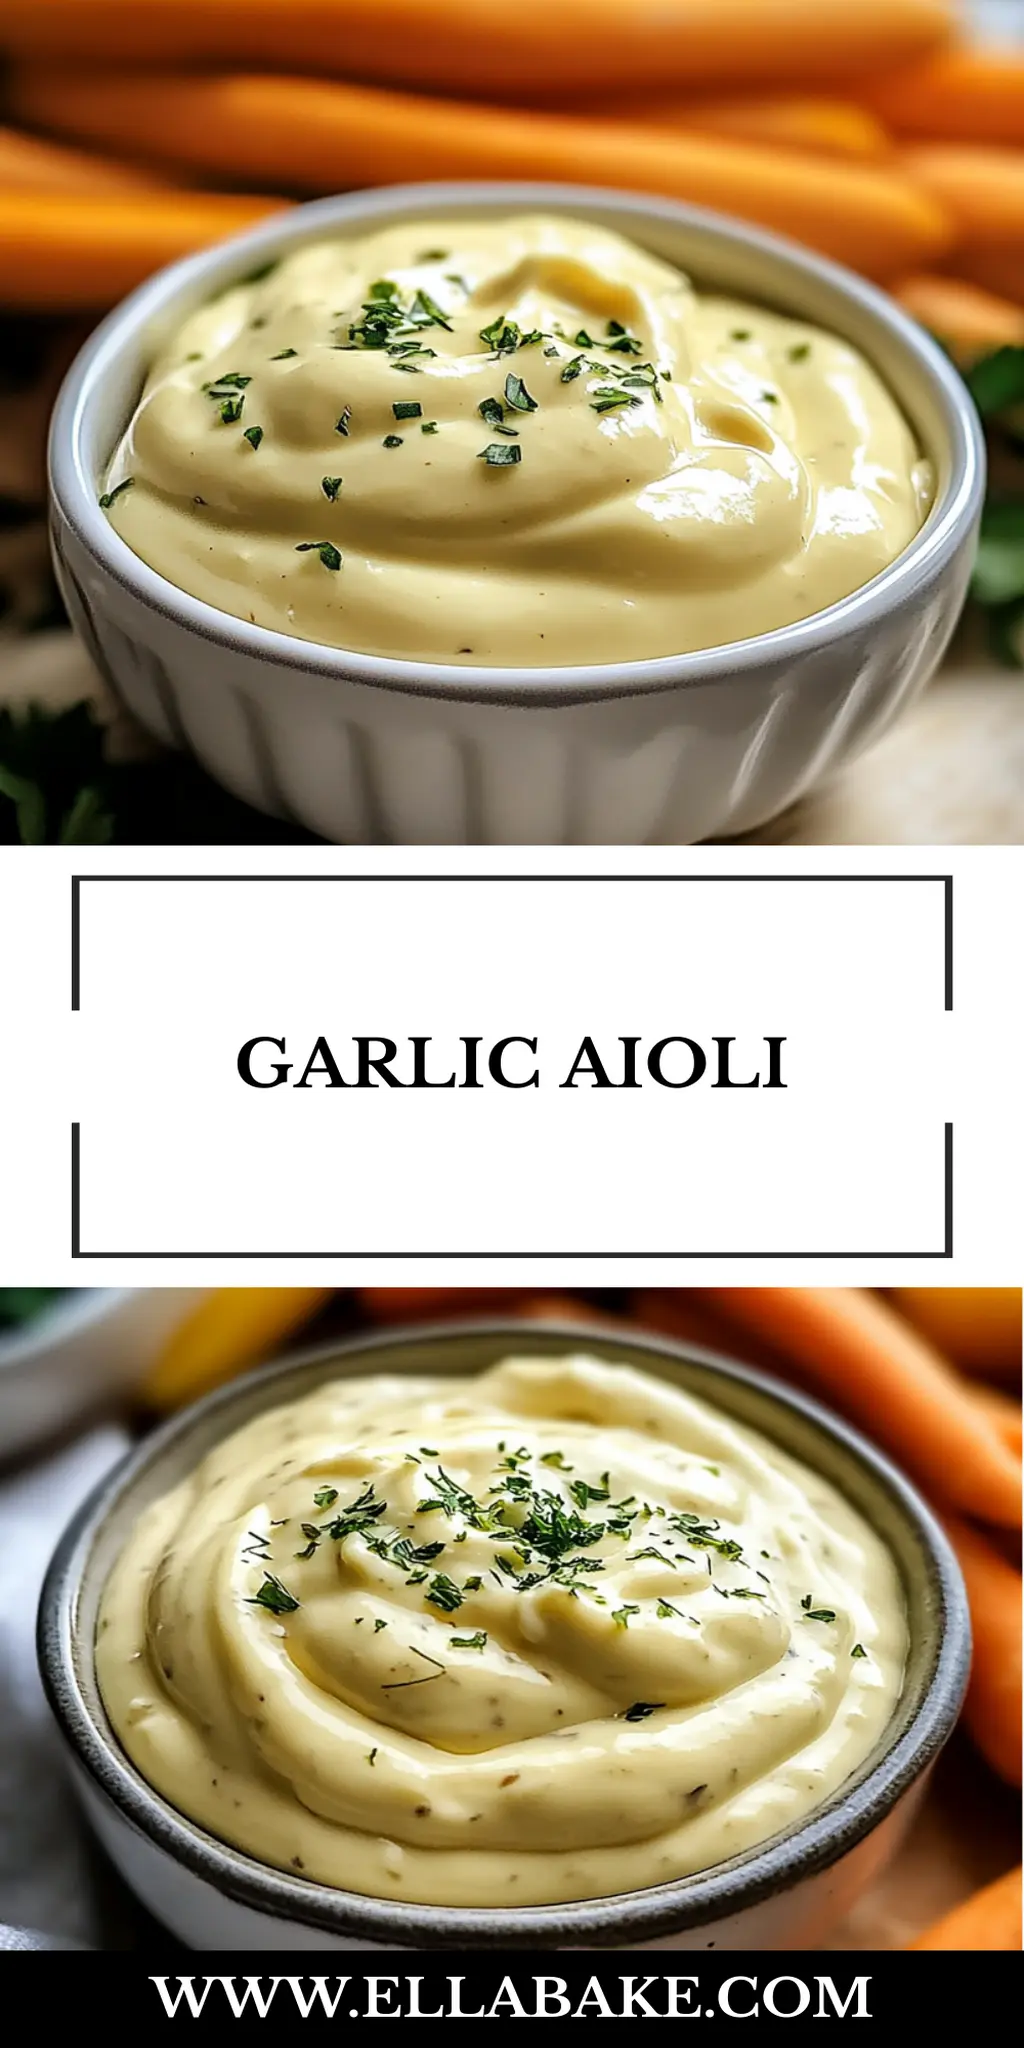
There’s nothing quite like the moment when you dip a crispy vegetable or warm bread into a luscious, homemade sauce. The first time I made Garlic Aioli, a blend of rich mayonnaise and zesty garlic, it transformed an ordinary meal into an unforgettable feast. Picture this: as I whisked in the olive oil, the vibrant aroma of fresh garlic mingled with the tang of lemon juice, creating a symphony of flavors that instantly elevated my dish.
I discovered this delightful recipe during a kitchen experiment one lazy afternoon, searching for a way to spice up my usual snacks. Not only is Garlic Aioli ridiculously easy to whip up, but it’s also incredibly versatile. Whether you’re serving it alongside roasted vegetables, sandwiches, or using it as a dip for fries, this creamy sauce is bound to impress.
Join me as we explore how to make this simple yet decadent Garlic Aioli that’ll have your taste buds dancing. Let’s dive into this recipe that effortlessly takes your culinary game to the next level!
Why You'll Love This Garlic Aioli
- Garlic Aioli is incredibly easy to prepare, allowing you to whip it up in just 10 minutes with minimal effort.
- The combination of creamy mayonnaise and zesty garlic delivers a flavor explosion that will tantalize your taste buds.
- This sauce is incredibly versatile, making it the perfect accompaniment for everything from sandwiches to roasted veggies and even fries.
- Visually, its creamy texture and hint of fresh herbs make it an attractive addition to any dish, elevating your meal with style and sophistication.
Garlic Aioli Ingredients
For the Base
• Mayonnaise – A creamy foundation that provides the rich texture you crave in Garlic Aioli.
• Fresh Garlic – Use 2-3 cloves for that bold, aromatic punch that makes your aioli sing.
• Lemon Juice – 1-2 tablespoons add a refreshing zing, balancing the richness of the mayo.
For the Emulsion
• Olive Oil – Drizzle in 1/4 cup while whisking to create a smooth, velvety consistency.
• Salt – Season to taste, enhancing all the delicious flavors in your Garlic Aioli.
• Black Pepper – A dash rounds out the flavors with a hint of spice.
Optional Add-ins
• Fresh Herbs – Fold in your choice of herbs for a burst of color and freshness. Perfect for customizing your Garlic Aioli!
How to Make Garlic Aioli
-
Peel and Mince — Start by peeling 2-3 cloves of fresh garlic and finely mincing them to release their aromatic essence. This step lays the foundation for the bold flavor of your Garlic Aioli.
-
Mix the Base — In a small mixing bowl, combine 1 cup of creamy mayonnaise with the minced garlic, 1-2 tablespoons of tangy lemon juice, and a pinch of salt and black pepper. Stir to blend all the flavors harmoniously.
-
Emulsify — While whisking continuously, slowly drizzle in 1/4 cup of extra virgin olive oil. Keep whisking until the mixture is emulsified and achieves a smooth, creamy consistency.
-
Taste and Adjust — Taste your aioli and adjust the seasoning with additional salt, pepper, or lemon juice if necessary. You want to achieve that perfect balance of flavors!
-
Incorporate Herbs — If you like, fold in finely chopped fresh herbs to add a burst of color and flavor to your Garlic Aioli. Basil, parsley, or dill works wonderfully!
-
Chill Before Serving — Finally, transfer your luscious aioli to an airtight container and chill it in the refrigerator for at least 30 minutes. This will allow the flavors to meld beautifully.
Optional: Serve with crispy fries or fresh vegetable sticks for a delicious dip!
Exact quantities are listed in the recipe card below.
What to Serve with Garlic Aioli?
Imagine the delightful crunch of fresh veggies or crispy fries, perfectly paired with this creamy, zesty sauce that elevates every bite.
-
Crispy Fries: The golden crunch of fries delivers a satisfying contrast to the silky texture of Garlic Aioli, making each dip utterly delicious.
-
Roasted Vegetables: Enhance their earthy flavors with a dollop of Garlic Aioli; the pairing creates a harmony that turns veggies into a star!
-
Grilled Chicken: The rich creaminess of Garlic Aioli complements the smokiness of grilled chicken, adding a burst of flavor that elevates your meal.
-
Fish Tacos: Add a touch of gourmet flair by drizzling Garlic Aioli over fish tacos; the bright zesty notes tie all the ingredients together beautifully.
-
Sandwich Spread: Use it as a luscious spread in sandwiches; its creamy texture brings a delightful richness that transforms lunch into a feast!
-
Charcuterie Board: Serve as a dip alongside a selection of cheeses and cured meats; Garlic Aioli adds a sophisticated touch that impresses guests.
-
Fresh Salad Dressing: Whisk into your salad for a twist; it brings a creamy, garlicky depth to fresh greens, making every bite pop!
-
Chips and Veggies: An ideal dip for crispy chips and assorted veggie sticks; the refreshing taste of Garlic Aioli enhances your snacking experience.
Garlic Aioli Variations
Customize your Garlic Aioli to explore new flavors and textures that’ll delight your palate.
- Vegan: Substitute mayonnaise with silken tofu blended until smooth for a creamy, plant-based version.
- Spicy Twist: Add a teaspoon of sriracha or your favorite hot sauce for an exciting kick that complements the garlic.
- Herb Infusion: Use fresh herbs like basil, cilantro, or dill for a garden-fresh twist that brightens up your sauce.
- Smoky Flavor: Mix in a bit of smoked paprika to introduce a rich, smoky depth that pairs beautifully with roasted veggies.
- Tangy Zest: Incorporate some finely grated lemon or orange zest to enhance the citrus notes and add brightness to your aioli.
- Creamy Avocado: Blend in half a ripe avocado for a creamy texture and a boost of nutrition that makes it irresistibly smooth.
- Nutty Delight: A tablespoon of tahini or almond butter can be added for a unique nutty flavor while enhancing creaminess.
- Roasted Garlic: Swap fresh garlic for roasted garlic for a milder, sweeter flavor that deepens the richness of your aioli.
Get creative with these variations, and elevate your Garlic Aioli into something uniquely yours!
Make Ahead Options
These Garlic Aioli are perfect for busy weeknights and meal prep lovers! You can prepare the base of the aioli—combining the mayonnaise, minced garlic, lemon juice, and seasoning—up to 3 days in advance, storing it in an airtight container in the refrigerator. This keeps the flavors fresh and vibrant. For the best results, emulsify the olive oil right before serving to maintain that creamy texture, as the aioli thickens slightly over time. If you plan to add fresh herbs, fold them in just before serving to keep their color and flavor bright. With these make-ahead options, you’ll have a delicious Garlic Aioli ready to elevate your meals with minimal effort!
How to Store and Freeze Garlic Aioli
Fridge: Store your Garlic Aioli in an airtight container in the refrigerator for up to 5 days. This keeps the flavors fresh and vibrant for your next meal!
Freezer: For longer storage, you can freeze Garlic Aioli in a freezer-safe container for up to 2 months. Just remember to leave some space for expansion as it freezes.
Thawing: To use frozen Garlic Aioli, thaw it overnight in the refrigerator. After thawing, give it a good stir to re-emulsify any separated ingredients before serving.
Reheating: While Garlic Aioli is typically enjoyed cold, you can gently reheat it in a microwave for a few seconds if you prefer a warmer sauce. Just ensure not to overheat!
Chef's Helpful Tips
- When making Garlic Aioli, ensure that your garlic is finely minced to avoid any large chunks that can overpower the flavor.
- For a creamier texture, use mayonnaise that is at room temperature before mixing it with the other ingredients.
- Whisking continuously while drizzling in the olive oil is key to achieving a perfect emulsion, so take your time during this step.
- Remember to chill the aioli for at least 30 minutes to enhance the flavors before serving.
Garlic Aioli Recipe FAQs
How do I choose the best garlic for my aioli?
Absolutely! When selecting garlic, look for firm bulbs that are plump and free from dark spots or soft spots. Fresh garlic will have a pungent aroma and a papery skin. I often opt for smaller cloves for a sharper flavor or larger ones for a milder hint!
How long does homemade Garlic Aioli last in the fridge?
Stored properly in an airtight container, your Garlic Aioli can remain fresh in the refrigerator for up to 5 days. Just give it a stir before using, and remember that its flavors will deepen over time, creating a wonderfully tasty experience!
Can I freeze Garlic Aioli?
Yes! You can freeze Garlic Aioli for up to 2 months. Just pour it into a freezer-safe container, leaving some space at the top since it may expand. When you’re ready to use it, simply thaw it overnight in the refrigerator, then stir well to re-emulsify any separated components.
What if my Garlic Aioli isn’t emulsifying?
If your aioli isn’t coming together, don’t worry! This can happen. Try these steps: first, ensure you’re whisking continuously while drizzling in the olive oil slowly. If it’s still not working, transfer your mixture to a blender or food processor and blend until emulsified. If it’s too thick, add a teaspoon of water to adjust the consistency!
Is Garlic Aioli safe for pets or anyone with allergies?
Very! However, be cautious. Garlic can be toxic to pets, particularly dogs, so keep your Garlic Aioli out of their reach. Additionally, if anyone has an allergy to eggs, it’s worth noting that mayonnaise typically contains egg. Always check the labels for allergens, and consider using vegan mayonnaise for a pet-friendly alternative!
Can I customize my Garlic Aioli with different herbs?
The more the merrier! I recommend using fresh herbs like basil, parsley, or dill for a vibrant flavor twist. Simply chop the herbs finely and fold them into the aioli after emulsifying. You can experiment and find the herb combination that fits your taste best!
Garlic Aioli
Ingredients
Equipment
Method
- Peel and mince 2-3 cloves of fresh garlic.
- In a small mixing bowl, combine 1 cup of mayonnaise, minced garlic, 1-2 tablespoons of lemon juice, and season with salt and pepper.
- While whisking continuously, slowly drizzle in 1/4 cup of olive oil until emulsified.
- Taste and adjust seasoning with salt, pepper, or lemon juice.
- Fold in finely chopped fresh herbs if desired.
- Transfer to an airtight container and chill for at least 30 minutes.

Leave a Comment