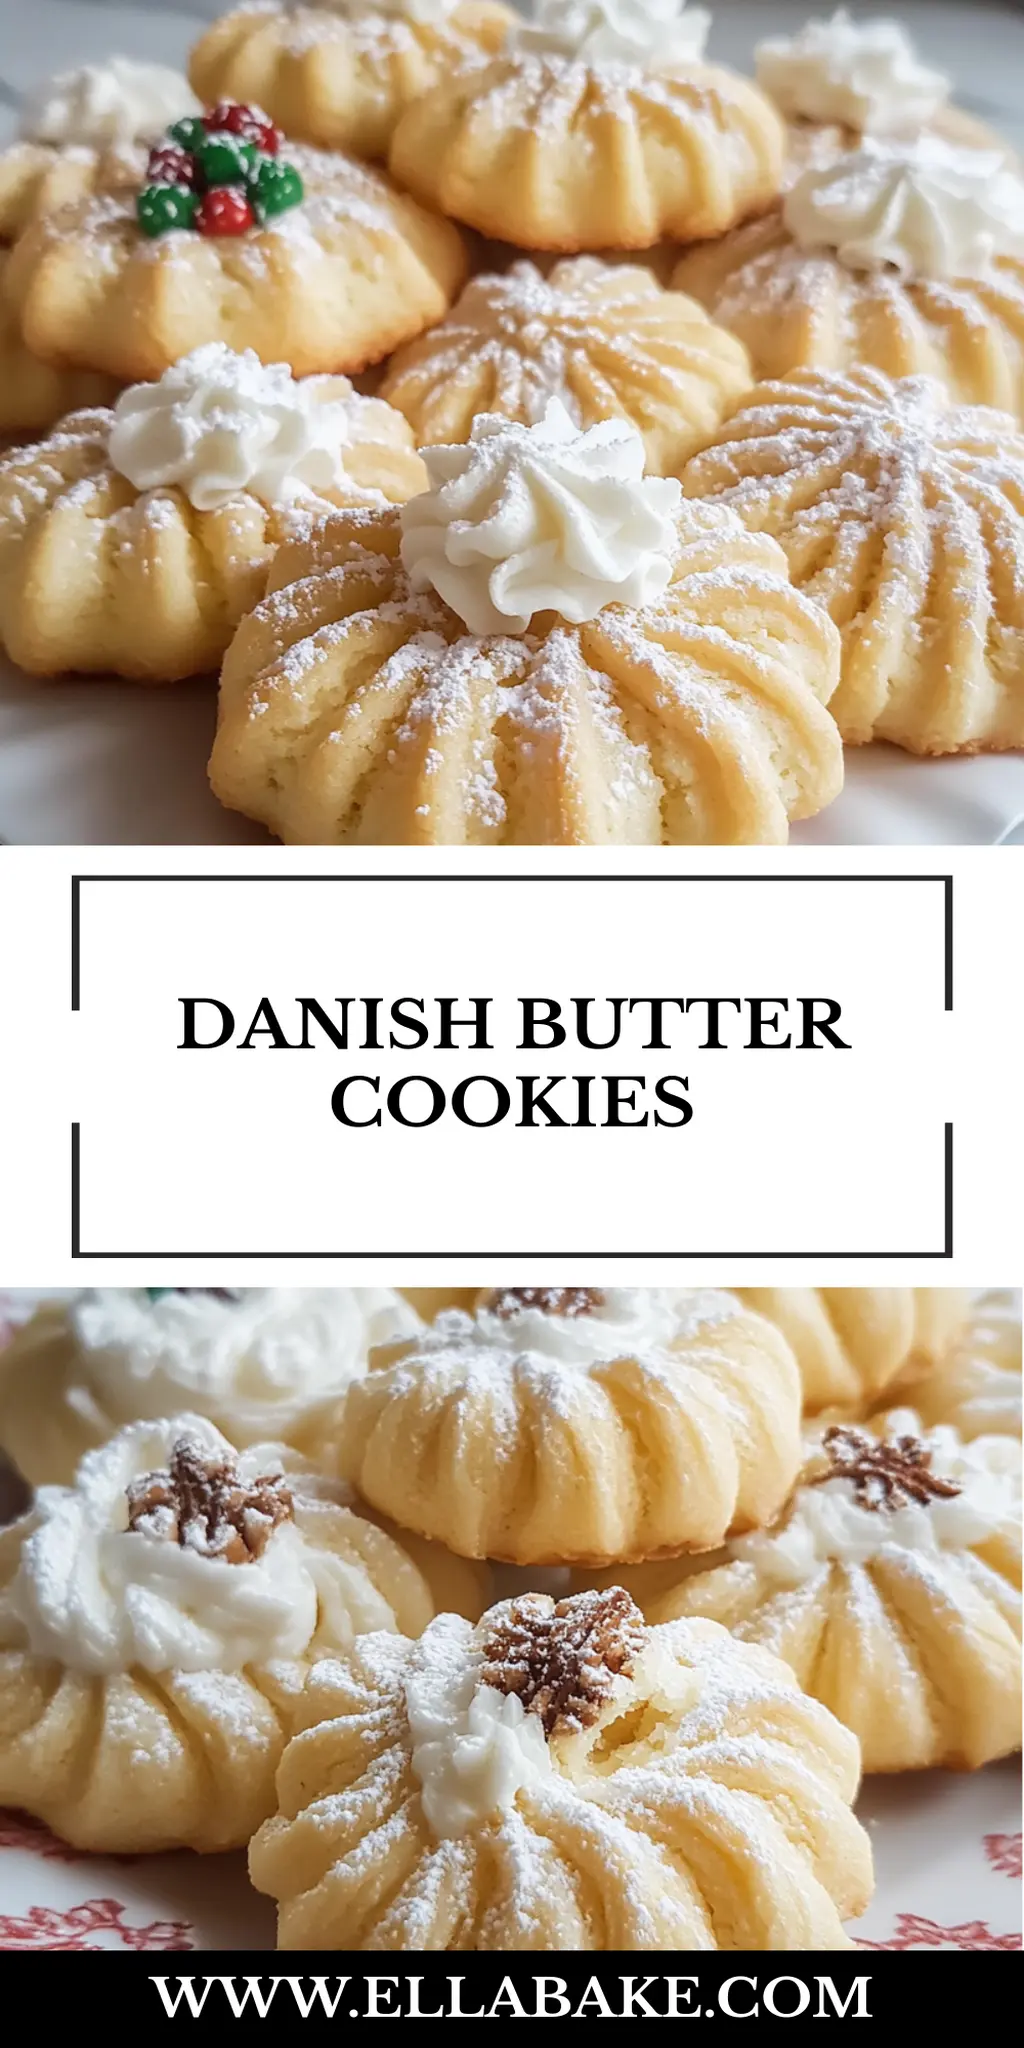
There’s something enchanting about the crunch of a crisp Danish Butter Cookie, especially when paired with a warm cup of tea or coffee. I discovered this delightful treat during a cozy afternoon baking session, and it has since become a staple in my kitchen. The beautiful simplicity of the recipe belies the sophisticated flavor and texture these cookies deliver. Each bite melts in your mouth, thanks to the creamy butter and a hint of vanilla, making them perfect for any occasion—or just to indulge yourself!
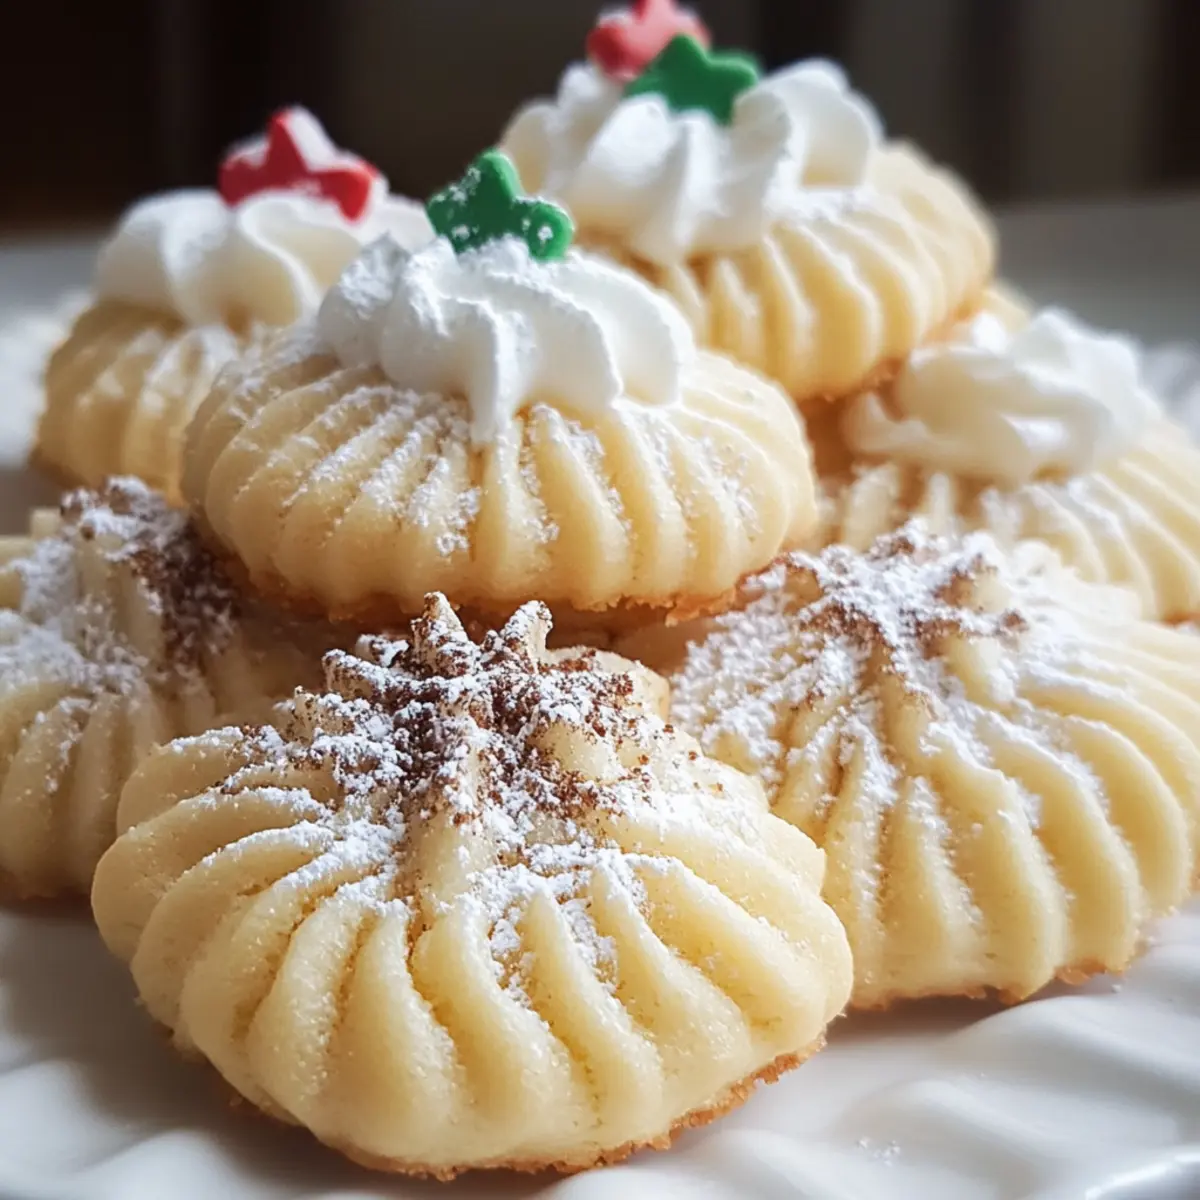
As winter approaches, the idea of baking a batch of these buttery morsels becomes irresistible. Not only are they easy to whip up, but they also give you a chance to get creative. Whether you prefer them plain, drizzled with dark chocolate, or adorned with colorful sprinkles, Danish Butter Cookies never fail to impress. It’s time to stir up some love in the kitchen and treat yourself and your loved ones to this scrumptious classic! Let’s dive into the recipe that will soon become your go-to for both casual snacking and festive gatherings.
Why You'll Love This Danish Butter Cookies
- These Danish Butter Cookies are incredibly easy to make, allowing you to whip up a delightful treat without spending hours in the kitchen.
- Each cookie bursts with rich butter flavor, complemented by a hint of vanilla that makes every bite a taste sensation.
- The versatility of this recipe means you can customize your cookies with chocolate dips and sprinkles, making them perfect for any occasion or personal preference.
- Visually, these cookies are a feast for the eyes with their appealing shapes and colorful decorations, sure to impress friends and family alike.
Danish Butter Cookies Ingredients
• Here’s everything you need to create these buttery delights!
For the Dough
- 255 g unsalted butter, softened – This ingredient provides the rich base and creamy texture essential for classic Danish Butter Cookies.
- 30 g powdered sugar – Adding a subtle sweetness that perfectly balances the butter flavor.
- 1 teaspoon vanilla extract – Enhances the aromatic character of the cookies, making them truly irresistible.
- 160 g all-purpose flour – The main structure component, contributing to the cookies’ soft yet crisp texture.
- 8 g cornstarch – Helps create a tender crumb while maintaining overall structure in each bite.
- 1-2 teaspoons heavy cream, as needed – Use to adjust the dough’s consistency for easy piping, ensuring beautifully shaped cookies.
For the Optional Chocolate Coatings
- 170 g dark chocolate chips or chocolate almond bark, melted – A deliciously rich topping that elevates your Danish Butter Cookies into a luxurious treat.
- 170 g white chocolate chips or white almond bark, melted – Adds a sweet, creamy contrast to the dark chocolate option.
- Candied sprinkles (optional) – These add a festive touch to your cookies, making them stand out on any dessert table.
How to Make Danish Butter Cookies
-
Prepare the baking sheet. Line a baking sheet with parchment paper to prevent the cookies from sticking and ensure easy cleanup afterward.
-
Cream the butter. In a medium bowl, beat the softened butter for 2-3 minutes until it becomes pale and creamy. Add the powdered sugar and continue mixing for 2 more minutes until the mixture is light and fluffy. Don’t forget to incorporate the vanilla extract for that delightful aroma!
-
Mix the dry ingredients. Add the all-purpose flour and cornstarch to the butter mixture. Stir gently until the flour is fully incorporated, forming a soft dough that’s easy to work with.
-
Pipe the cookies. Transfer the dough to a piping bag fitted with a large open star tip. If you find the dough too stiff, mix in 1–2 teaspoons of heavy cream until you achieve a smooth, piping-friendly texture. Pipe your desired shapes onto the prepared baking sheet.
-
Chill the cookies. Place the piped cookies in the refrigerator for 30 minutes to firm up. Meanwhile, preheat your oven to 175°C (350°F) so it’s hot and ready for baking!
-
Bake to perfection. Bake the cookies for 8–10 minutes, or until the edges are lightly golden. Let the cookies cool completely on a rack, relishing the heavenly aroma wafting through your kitchen!
-
Melt chocolate. If you’re opting for chocolate coating, melt the chocolate or almond bark in a microwave-safe bowl in 20-second intervals, stirring until smooth and glossy.
-
Decorate as desired. Dip the cooled cookies halfway in the melted chocolate, then place them on a parchment-lined tray. Sprinkle with candied sprinkles before the chocolate sets, creating a beautiful and festive treat. Let the cookies set until firm before serving to friends and family!
Optional: Drizzle with extra melted chocolate for a decorative touch.
Exact quantities are listed in the recipe card below.
What to Serve with Danish Butter Cookies?
Imagine the warm embrace of freshly baked cookies, perfectly complemented by delightful pairings that elevate both taste and experience.
-
Hot Tea: A soothing cup of fragrant tea enhances the buttery flavors while providing a soothing backdrop for your cookies.
-
Rich Coffee: The deep, bold taste of coffee pairs beautifully with the lightness of the cookies, creating an indulgent afternoon treat.
-
Fresh Berries: A vibrant mix of strawberries and blueberries adds a refreshing contrast and a burst of color to your dessert table.
-
Vanilla Ice Cream: The creamy richness of vanilla ice cream makes for a delightful dessert experience, perfect for sandwiching between cookies.
-
Fruit Compote: A spoonful of warm fruit compote balances the sweetness of the cookies with its tangy flavors, creating a lovely harmony.
-
Chocolate Dipping Sauce: For chocolate lovers, offering a side of warm, melted chocolate sauce transforms your sweet treat into a dip-worthy delight.
-
Moscato Wine: A chilled glass of Moscato’s fruity sparkles pairs excellently, adding a festive touch to gatherings with family and friends.
Baking these cookies opens up a world of delightful pairings, ensuring there’s something for everyone to enjoy!
Danish Butter Cookies Variations
Feel free to personalize these delightful Danish Butter Cookies and explore new flavor profiles!
-
Gluten-Free: Substitute all-purpose flour with a gluten-free blend for a cookie that everyone can enjoy guilt-free.
-
Nutty Twist: Add 50 g of finely chopped almonds or hazelnuts to the dough for an extra crunch and a warm nutty flavor.
-
Citrus Zest: Incorporate 1 teaspoon of lemon or orange zest into the dough for a bright, refreshing note that perfectly complements the buttery goodness.
These subtle adjustments elevate the cookies, making them a stunning treat for any occasion.
-
Dairy-Free: Use a dairy-free butter alternative in place of regular butter to create a delicious dairy-free version.
-
Spicy Kick: Mix in 1/4 teaspoon of cinnamon or nutmeg in the flour for a cozy spice twist that enhances the classic flavor profile.
-
Extra Chocolate: For chocolate lovers, fold in 85 g of chocolate chunks into the dough, adding gooey surprises in every bite.
-
Caramel Drizzle: After dipping in chocolate, drizzle with homemade or store-bought caramel sauce for a decadent finishing touch that will take your cookies over the top.
-
Holiday Sprinkles: Swap regular sprinkles for seasonal-themed ones to turn these cookies into festive treats perfect for any celebration.
These variations will inspire you to bake with joy and creativity; let your imagination run wild in the kitchen!
Make Ahead Options
These Danish Butter Cookies are perfect for meal prep enthusiasts! You can prepare the cookie dough up to 24 hours in advance; simply store it in an airtight container in the refrigerator. If you want to make it even easier, you can pipe the cookies onto the baking sheet and chill them for up to 3 days before baking. This keeps them fresh and ready to pop into the oven on a busy day. When you’re ready to bake, just preheat the oven and follow the usual baking steps. This way, you’ll have delicious, freshly-baked cookies with minimal effort, ensuring they’re just as delightful as if made on the spot!
How to Store and Freeze Danish Butter Cookies
Room Temperature: Store cookies in an airtight container at room temperature for up to 5 days to keep them fresh and prevent them from becoming stale.
Fridge: If you’d like to extend freshness, place the cookies in a sealed container in the fridge for up to 2 weeks. Just be aware that refrigeration can affect their texture slightly.
Freezer: For longer storage, freeze the cookies in a single layer on a baking sheet until firm, then transfer to a freezer-safe bag for up to 3 months. Thaw before serving!
Reheating: To enjoy warm cookies again, briefly pop them in a 350°F (175°C) oven for about 5 minutes or microwave individually for 10-15 seconds.
Chef's Helpful Tips
- When making Danish Butter Cookies, ensure your butter is soft but not melted to achieve the perfect creamy consistency when creaming it with sugar.
- A common mistake is overmixing the dough after adding flour; mix just until combined for a tender cookie.
- If your dough is too stiff for piping, gradually add the heavy cream until it reaches a smooth and workable texture.
- Remember to chill the piped cookies for at least 30 minutes before baking to help them maintain their shape and achieve that delightful crispiness.
Danish Butter Cookies Recipe FAQs
How do I select the best butter for my Danish Butter Cookies?
Absolutely! For the best flavor and texture, choose high-fat unsalted butter. Look for butter that is labeled “sweet cream” for a creamy taste. It should be softened at room temperature to blend easily with sugar—just leave it out for about 30 minutes before you start baking.
What is the best way to store Danish Butter Cookies?
To keep your cookies fresh, place them in an airtight container at room temperature for up to 5 days. If you want to extend their shelf life, you can refrigerate them in a sealed container for about 2 weeks. Just remember, refrigeration might slightly alter their texture, making them a bit firmer.
Can I freeze Danish Butter Cookies?
Very! Freezing is a great way to preserve your cookies. Lay them out on a baking sheet in a single layer and freeze them until firm. After that, transfer the cookies into a freezer-safe bag, pressing out as much air as possible. They can be stored for up to 3 months. To enjoy, just let them thaw at room temperature or pop them in a preheated 350°F (175°C) oven for about 5 minutes.
What should I do if the dough is too stiff to pipe?
If your dough feels tough, don’t worry! Simply add 1-2 teaspoons of heavy cream to the mix. Start with one teaspoon, work it into the dough, and check the consistency. You’re aiming for a soft yet manageable texture that easily fits through the piping bag without being runny.
Are Danish Butter Cookies suitable for those with nut allergies?
Yes! This classic Danish Butter Cookies recipe is nut-free, making it suitable for those with nut allergies. Make sure to double-check your chocolate chips or any additional decorations as some brands may process nuts in the same facility. Always use allergy-friendly products to ensure everyone’s safety.
How long should I chill the piped cookies before baking?
I strongly recommend chilling the piped cookies for at least 30 minutes in the refrigerator. This step not only helps them hold their shape better during baking but also contributes to that delightful crispiness you’re aiming for in each bite.
Danish Butter Cookies
Ingredients
Equipment
Method
- Prepare the baking sheet by lining it with parchment paper.
- Cream the butter for 2-3 minutes until pale and creamy; add powdered sugar and mix for 2 more minutes.
- Mix dry ingredients: add flour and cornstarch to creamed mixture, stirring gently until incorporated.
- Pipe the cookies using a piping bag fitted with a star tip; adjust stiffness with heavy cream if needed.
- Chill piped cookies for 30 minutes; preheat oven to 175°C (350°F).
- Bake cookies for 8-10 minutes until edges are lightly golden; let cool on rack.
- Melt chocolate or almond bark in intervals until smooth.
- Dip cooled cookies in melted chocolate; sprinkle with candied sprinkles before chocolate sets.
Leave a Comment