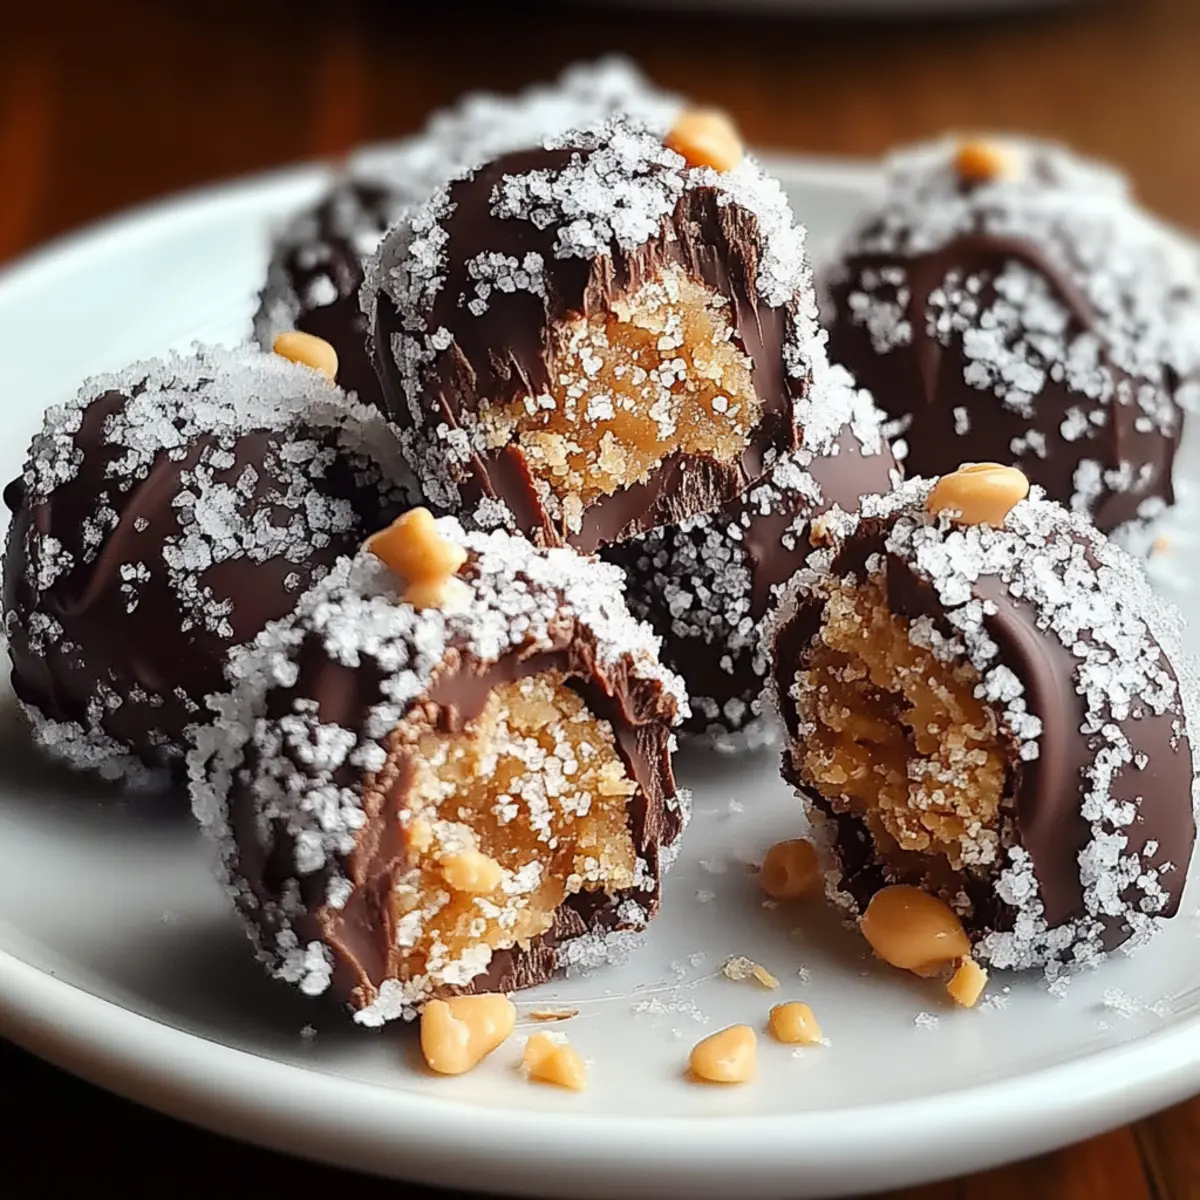
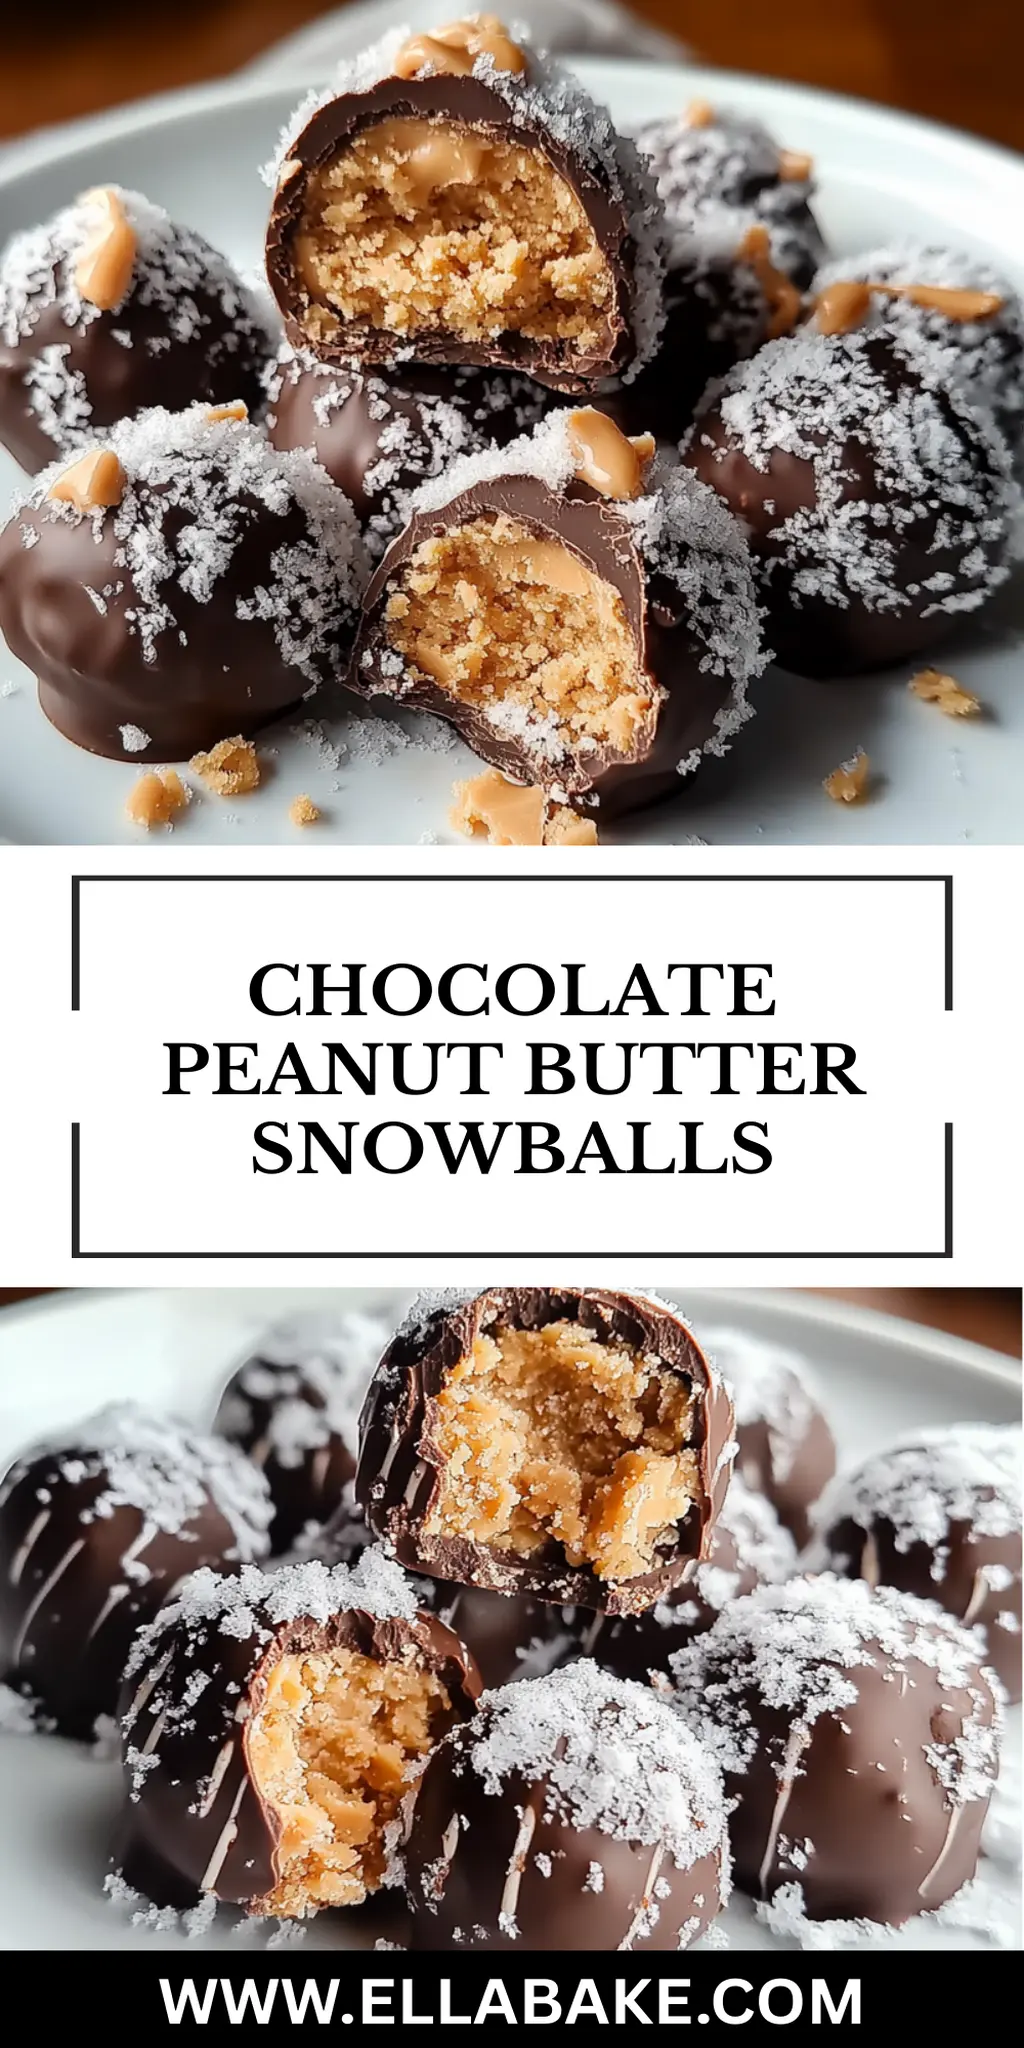
There’s something undeniably comforting about the combination of chocolate and peanut butter, isn’t there? Just the thought of sinking your teeth into a Chocolate Peanut Butter Snowball evokes memories of carefree afternoons spent in the kitchen, experimenting with flavors and textures. That’s exactly how this recipe came to life, blending the creaminess of peanut butter with the rich indulgence of chocolate, transforming simple ingredients into a delightful treat.
After a whirlwind day filled with work and responsibilities, I found myself craving something sweet yet nostalgic. I reached for the peanut butter jar and some melting chocolate, and voilà! These snowballs make for the perfect bite-sized indulgence—ideal for sharing at gatherings or snacking on at home. Plus, they require minimal effort for a crowd-pleasing result.
Let’s dive into this easy, decadent recipe that balances flavor and fun, making sure your dessert table is anything but ordinary!
Why You'll Love This Chocolate Peanut Butter Snowballs
- You’ll love how easy these Chocolate Peanut Butter Snowballs are to make, with minimal prep and straightforward steps perfect for any skill level.
- The delightful combination of rich chocolate and creamy peanut butter creates an explosion of flavor that will satisfy any sweet tooth.
- These snowballs are incredibly versatile—you can customize them with your favorite toppings or mix-ins to suit any occasion.
- Plus, they look absolutely stunning on a dessert platter, making them an impressive treat for parties or gatherings.
Chocolate Peanut Butter Snowballs Ingredients
• Get ready to make a delightful treat!
For the Dough
- Creamy peanut butter – the star ingredient that gives these snowballs their unmistakable flavor.
- Unsalted butter – adds a rich creaminess that binds the mixture beautifully.
- Powdered sugar – sweeps in to sweeten things up—make sure to sift for a smooth texture!
- Vanilla extract – enhances the overall flavor and aroma, elevating the snowballs to another level.
- Fine salt (optional) – a pinch enhances sweetness and balances flavors.
- Finely crushed graham crackers (optional) – introduce a slight crunch and flavor, reminiscent of s’mores.
- Crushed vanilla wafers (optional) – switches things up with a delightful texture and flavor twist.
- Powdered milk (optional) – adds creaminess and enhances the snowballs’ structure.
For the Coating
- Semi-sweet or milk chocolate melting wafers or chips – make sure to choose your favorite for a luscious outer layer.
- Vegetable or coconut oil (optional) – use for a smoother chocolate coating that’s easier to work with.
For the Caramel Drizzle
- Soft caramel candies or caramel sauce – for that gooey touch that makes each bite irresistible!
- Heavy cream or milk – helps melt the caramels to a pourable consistency.
For Decoration
- Sea salt flakes – sprinkle them on top for a beautiful finish and a hint of saltiness.
- Crushed peanuts – add a delightful crunch and extra peanut flavor for garnish.
- Sprinkles – make these snowballs fun and festive with your favorite colors.
- White chocolate drizzle – drape elegantly over the snowballs for that extra touch of sweetness.
Now, let’s get rolling on creating your own Chocolate Peanut Butter Snowballs!
How to Make Chocolate Peanut Butter Snowballs
-
Blend In a medium mixing bowl, combine creamy peanut butter, melted butter, vanilla extract, and a pinch of salt. Stir until the mixture is smooth and creamy, creating a luxurious base for your treats.
-
Incorporate Gradually add sifted powdered sugar to the bowl, mixing until a thick, pliable dough forms. Adjust the powdered sugar as needed for a firm, non-sticky texture that holds its shape.
-
Mix In If you’d like an extra crunch or flavor, fold in crushed graham crackers, vanilla wafers, or powdered milk to your dough, adding delightful complexity to each snowball.
-
Prepare Line a baking sheet with parchment paper, providing a non-stick surface for your chocolate-coated creations.
-
Portion Use a teaspoon or small scoop to take dough, then roll it in your palms to form smooth balls, about 1 inch in diameter. Place your beautifully shaped snowballs on the prepared tray.
-
Chill Place the tray in the refrigerator for at least 25 minutes, or for a quicker option, freeze for 10 to 15 minutes. This step ensures the centers are firm before coating them in chocolate.
-
Melt In a microwave-safe bowl, melt chocolate in 20 to 30 second intervals, stirring after each until it reaches a silky, smooth consistency. If you prefer, blend in vegetable or coconut oil for a thinner texture.
-
Coat Remove your chilled snowball centers from the refrigerator. Using a fork or dipping tool, carefully submerge each ball into the melted chocolate, letting any excess chocolate drip back into the bowl. Return coated snowballs to the parchment-lined tray.
-
Prepare Caramel To create the gooey drizzle, melt soft caramels with heavy cream or milk in a separate microwave-safe bowl, heating in 10 to 15 second intervals until fully fluid and smooth.
-
Decorate Pipe or spoon the melted caramel in thin lines over your chocolate-coated balls. While the caramel is still warm, sprinkle sea salt flakes, crushed peanuts, sprinkles, or a white chocolate drizzle to add layers of flavor and fun.
-
Firm Up Place the tray back in the refrigerator for 15 to 20 minutes, allowing the chocolate and caramel to fully set and firm up, ensuring a delightful texture.
-
Store Once set, transfer your scrumptious Chocolate Peanut Butter Snowballs to an airtight container for storage. These delightful bites are ready to enjoy at any time!
Optional: Drizzle extra melted chocolate over them for an added touch of indulgence.
Exact quantities are listed in the recipe card below.
Make Ahead Options
These Chocolate Peanut Butter Snowballs are perfect for busy cooks looking to save time while indulging in a delightful treat! You can prepare the dough up to 24 hours in advance—simply mix all the ingredients according to the recipe, roll into balls, and refrigerate them. This step ensures the snowballs hold their shape and flavors meld beautifully. When you’re ready to serve, just melt the chocolate and coat the chilled centers; allow them to firm up for about 15 to 20 minutes in the fridge again before decorating. By prepping ahead, you’ll have these delicious treats ready with minimal effort, making them just as scrumptious as if made fresh!
What to Serve with Chocolate Peanut Butter Snowballs?
Indulging in these sweet bites is just the beginning—why not elevate your dessert experience?
-
Tall Glass of Milk: A classic pairing, the creamy richness of milk enhances the decadent chocolate and peanut butter flavors perfectly.
-
Coffee or Espresso: The bitterness of a freshly brewed cup balances the sweetness of the snowballs, making every bite a delightful revelation.
-
Vanilla Ice Cream: A scoop of creamy vanilla ice cream alongside the snowballs creates a luxurious texture contrast that’s simply irresistible.
-
Chocolate Dipping Sauce: Serve with extra melted chocolate for those who crave an indulgent double-chocolate experience—perfect for dipping!
-
Fresh Berries: The tartness of strawberries, raspberries, or blueberries adds a refreshing contrast, cutting through the richness of the snowballs.
-
Coconut Macaroons: Their chewy texture and nutty flavors complement the creamy snowballs beautifully, creating a delightful dessert duo.
-
Fruit Salad: A colorful mix of seasonal fruits brings a burst of freshness to the table, enhancing the overall dessert spread.
-
Sparkling Water with Lime: For a refreshing drink, this adds a zing that contrasts well with the sweetness, keeping your palate invigorated.
-
Caramel Brownies: If you’re dreaming of extra decadence, the rich, fudgy brownies bring an exciting twist that chocolate lovers will adore.
Chocolate Peanut Butter Snowballs Variations
Feel free to make these Chocolate Peanut Butter Snowballs your own with a few simple twists and substitutions.
-
Nut-Free: Swap creamy peanut butter for sunflower seed butter to avoid nuts altogether while maintaining that creamy richness. These snowballs remain just as delightful and suitable for school snacks!
-
Healthy Twist: Replace powdered sugar with a blend of coconut flour and erythritol for a low-sugar option that still satisfies your sweet cravings. Enjoy a guilt-free treat that feels indulgent!
-
Flavor Boost: Add a teaspoon of espresso powder to the dough for a coffee-infused flavor that deeply complements the chocolate. This twist will tantalize coffee lovers and enhance the overall richness.
-
Texture Variation: Incorporate crispy rice cereal into the dough for an added crunch that contrasts delightfully with the silky coating. Each bite will surprise and awaken the senses!
-
Spicy Kick: Mix in a pinch of cayenne pepper or chili powder for those who love a bit of heat. This unexpected twist adds an adventurous kick to your snowballs that’ll excite your taste buds.
-
Seasonal Flavor: Stir in a dash of cinnamon and a few chopped dried cranberries for a festive holiday twist. This combination adds warmth and a fruity surprise, perfect for celebrations!
-
Vegan-Friendly: Use dairy-free chocolate and a plant-based butter alternative to make these snowballs suitable for a vegan diet. They’ll still taste just as rich and indulgent as the original!
-
Chocolate Lovers: Double the chocolate by rolling the snowballs in mini chocolate chips before coating them in melted chocolate. This adds an extra layer of decadence that chocolate enthusiasts will savor!
How to Store and Freeze Chocolate Peanut Butter Snowballs
Room Temperature: Store your Chocolate Peanut Butter Snowballs in an airtight container at room temperature for up to 3 days. Enjoy them as a delightful grab-and-go snack!
Fridge: If you’d like to extend their freshness, keep the snowballs in the refrigerator for about a week. Just ensure they’re in a sealed container to maintain their texture and flavor.
Freezer: For longer storage, place the snowballs in a freezer-safe container or bag, layered with parchment paper, and freeze for up to 3 months. To enjoy, thaw in the fridge overnight or at room temperature for a few hours.
Reheating: Simply enjoy them cold or let them come to room temperature before serving. For a warm treat, you can microwave a couple for 10-15 seconds, but be cautious not to melt the chocolate coating.
Chef's Helpful Tips
- When making Chocolate Peanut Butter Snowballs, ensure your peanut butter is at room temperature for easier mixing and a smoother dough.
- A common mistake is adding too much powdered sugar too quickly; gradually incorporate it to achieve the desired consistency without making it overly sweet.
- To achieve perfectly round snowballs, use wet hands to prevent the dough from sticking and ensure a smooth surface.
- For optimal chocolate coating, let the melted chocolate cool slightly before dipping to prevent it from melting the peanut butter centers.
Chocolate Peanut Butter Snowballs Recipe FAQs
What type of peanut butter should I use for the Chocolate Peanut Butter Snowballs?
Absolutely! I recommend using creamy peanut butter for these snowballs as it gives a smooth consistency that blends perfectly with the other ingredients. Look for a brand that has no added sugar or hydrogenated oils for the best flavor and texture.
How should I store leftover Chocolate Peanut Butter Snowballs?
You can store your Chocolate Peanut Butter Snowballs in an airtight container at room temperature for up to 3 days. If you’d like them to last longer, refrigerate them for about a week, ensuring the container is properly sealed to maintain their texture and flavor.
Can I freeze Chocolate Peanut Butter Snowballs?
Very! To freeze, place the snowballs in a single layer on a baking sheet and freeze until solid. Then transfer them to a freezer-safe container layered with parchment paper. They can be frozen for up to 3 months. To enjoy, simply thaw them overnight in the fridge or leave them out at room temperature for a couple of hours.
My chocolate coating is too thick—what should I do?
If you find your chocolate coating is too thick, you can thin it out! Just add a teaspoon of vegetable or coconut oil when you melt the chocolate; this will give you the smooth, silky texture that’s ideal for dipping. Also, ensure you’re melting the chocolate in short intervals to avoid overheating, which can cause clumping.
Are Chocolate Peanut Butter Snowballs suitable for people with peanut allergies?
Unfortunately, they’re not suitable, since the main ingredient is peanut butter. If you’re looking for a similar treat for someone with peanut allergies, consider substituting the peanut butter with sunflower seed butter or an alternative nut-free spread. Just be sure to double-check all other ingredients for any allergens!
Can I customize the toppings for my Chocolate Peanut Butter Snowballs?
Absolutely! The more the merrier when it comes to toppings! You can sprinkle on crushed nuts, different colors of sprinkles, or even a drizzle of caramel or white chocolate. Experimenting with your favorite flavor pairings will give your snowballs a unique twist that’s sure to impress!
Chocolate Peanut Butter Snowballs
Ingredients
Equipment
Method
- In a medium mixing bowl, combine creamy peanut butter, melted butter, vanilla extract, and a pinch of salt. Stir until the mixture is smooth and creamy.
- Gradually add sifted powdered sugar to the bowl, mixing until a thick, pliable dough forms.
- If desired, fold in crushed graham crackers, vanilla wafers, or powdered milk to add complexity to each snowball.
- Line a baking sheet with parchment paper.
- Use a teaspoon or small scoop to take dough, roll it into smooth balls, about 1 inch in diameter, and place on the tray.
- Place the tray in the refrigerator for at least 25 minutes, or freeze for 10-15 minutes.
- Melt chocolate in a microwave-safe bowl, stirring every 20-30 seconds until smooth. Optionally, blend in vegetable or coconut oil.
- Remove chilled snowball centers and dip each into the melted chocolate, letting excess drip back into the bowl.
- Melt soft caramels with heavy cream or milk in a microwave-safe bowl, heating until fully fluid and smooth.
- Pipe or spoon the melted caramel over the chocolate-coated balls. Sprinkle with toppings while caramel is warm.
- Refrigerate for 15-20 minutes to set chocolate and caramel.
- Transfer to an airtight container for storage.
Leave a Comment