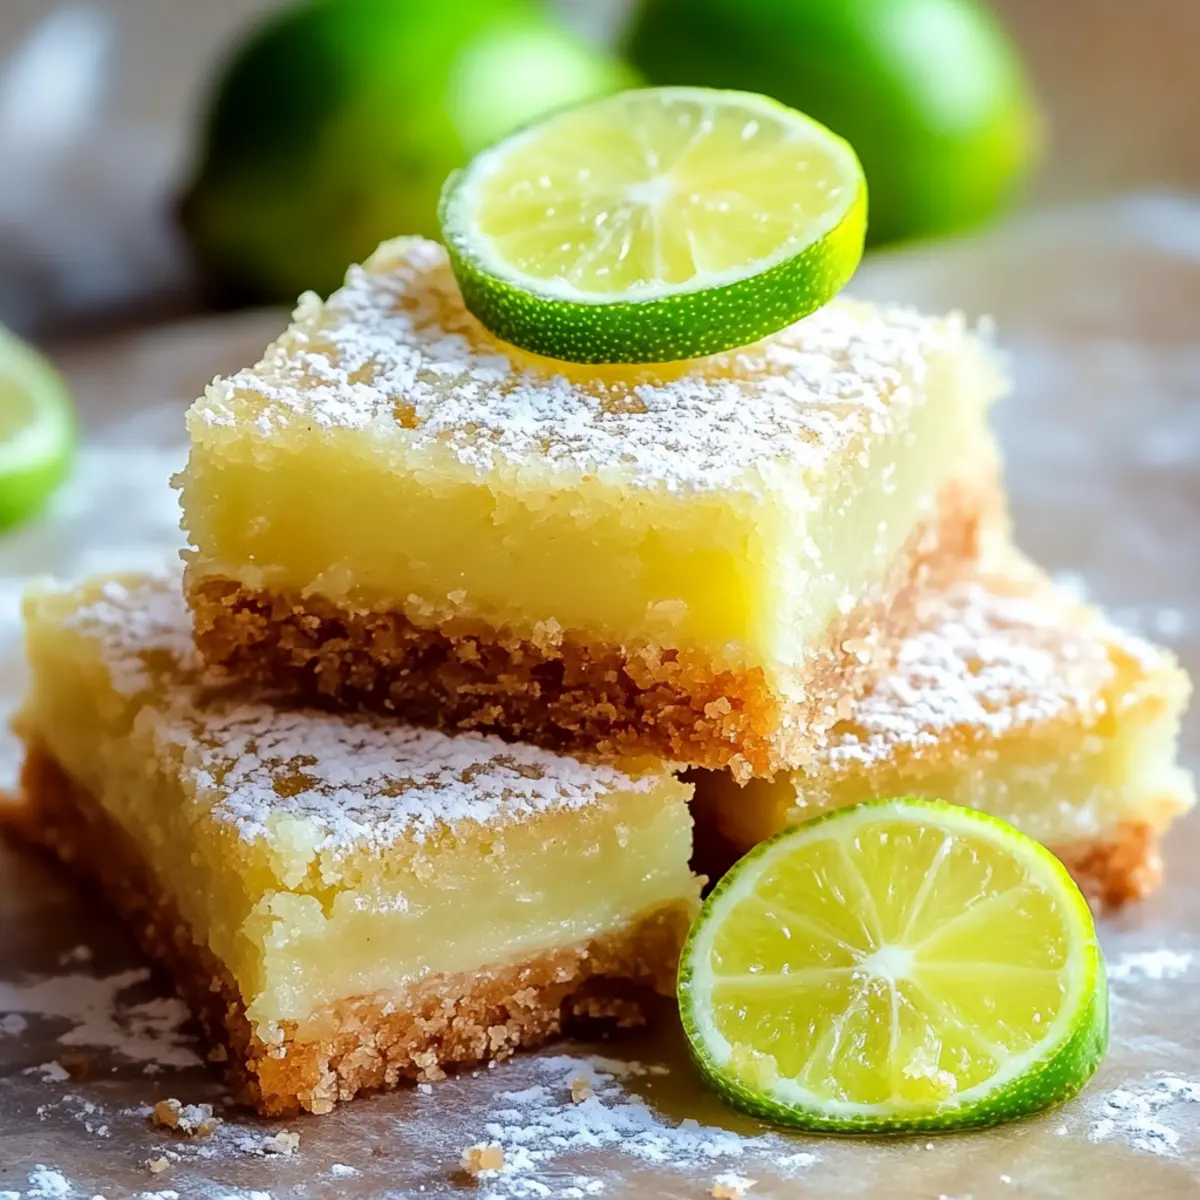
There’s a certain joy that comes with biting into a perfectly chilled Key Lime Bar, and I swear, it’s an instant ticket to a sunny beach, no matter the weather outside. The tanginess of fresh key lime juice dances with sweet notes, while the buttery crust provides a satisfying crunch—each bite is a delightful contradiction of tart and sweet, leaving you craving more.
I first whipped these bars up on a whim, craving something bright and refreshing after a long week filled with takeout. They quickly became a go-to in my kitchen, charming everyone from family to friends at gatherings. The simplicity of this recipe is as incredible as the taste, making it the perfect solution for dessert when you want to impress without the stress.
So, if you’re ready to elevate your dessert game with this easy-to-follow recipe for Key Lime Bars, let’s get started and create something that will have everyone asking for seconds!
Why You'll Love This Key Lime Bars
- This Key Lime Bars recipe is incredibly easy to make, allowing even novice bakers to impress their friends and family.
- The vibrant flavor combination of tangy key lime and sweet buttery crust makes every bite a taste sensation that you won’t be able to resist.
- These bars are versatile enough to serve at any occasion, from summer picnics to cozy dinner parties, making them a perfect addition to your dessert repertoire.
- Visually appealing with a dusting of powdered sugar, they’ll surely catch the eye and delight the taste buds of anyone who tries them.
- Impress your guests with this crowd-pleasing treat that’s both refreshing and indulgent.
Key Lime Bars Ingredients
For the Crust
- Unsalted butter – 227 g, softened for a rich base.
- Granulated sugar – 100 g, to sweeten that buttery goodness.
- All-purpose flour – 250 g, gives structure to the crust.
- Kosher salt – 1.25 g (1/4 teaspoon), enhances sweetness and flavor.
For the Filling
- Large eggs – 5, at room temperature for a perfect emulsion.
- Granulated sugar – 300 g, balances the tartness of the key lime.
- All-purpose flour – 95 g, ensures the filling sets beautifully.
- Key lime juice – 180 ml, the star ingredient that defines Key Lime Bars.
- Key lime zest – 2 tablespoons, adds intensity to the lime flavor.
For Serving
- Powdered sugar – for dusting, a sweet and charming finish.

How to Make Key Lime Bars
-
Preheat the oven: Start by preheating your oven to 175°C (350°F). Grab a 23×33 cm baking pan, line it with parchment paper, and grease it well to prevent sticking.
-
Cream the butter: In a mixing bowl, cream the softened butter using an electric mixer for about 2–3 minutes until it’s light and fluffy. Add in the granulated sugar and all-purpose flour, mixing until everything is well combined.
-
Press the dough: Take the buttery dough and use your fingers to evenly press it into the bottom of your prepared pan. Chill the crust in the refrigerator for 15 minutes, then bake for 15–20 minutes until the surface turns lightly golden. Allow it to cool completely.
-
Whisk the filling: In a large bowl, whisk together the eggs, granulated sugar, all-purpose flour, key lime juice, and key lime zest. Blend these ingredients until the mixture is smooth and well combined, creating a tangy custard.
-
Bake the filling: Pour the luscious custard over the cooled shortbread crust, ensuring it’s spread evenly. Bake at 175°C (350°F) for 25–30 minutes, or until the filling is just set and has a slight jiggle. Let it cool completely in the pan.
-
Chill and serve: For the best texture, refrigerate the bars until they’re cold. Dust with powdered sugar, slice them into 16 bars, and serve either chilled or at room temperature, ready to impress!
Optional: Garnish with additional key lime zest for an extra pop of flavor.
Exact quantities are listed in the recipe card below.
What to Serve with Key Lime Bars?
Create a delightful ending to your meal with these perfect pairings that enhance every zesty bite.
-
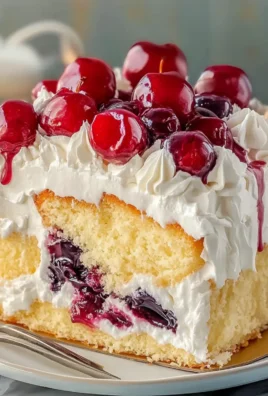
Fresh Berries: A bowl of mixed strawberries, blueberries, and raspberries brings a sweet and juicy contrast, brightening the dessert experience. Their natural sweetness complements the tartness of the bars beautifully.
-
Whipped Cream: Light and fluffy whipped cream adds an indulgent touch to your Key Lime Bars. It enriches each bite, balancing the tart flavors perfectly while offering a luxurious mouthfeel.
-
Coconut Ice Cream: A scoop of creamy coconut ice cream adds a tropical twist that harmonizes with the key lime taste. The rich, velvety texture creates a delicious contrast with the bar’s crispy crust.
-
Mint Mojito: Support the refreshing flavor profile by serving a mint mojito. The cool mint and lime elevate the tangy notes in the bars, making it a delightful beverage choice alongside dessert.
-
Shortbread Cookies: For a touch of nostalgia, serve buttery shortbread cookies. Their crumbly texture pairs nicely with the soft bars, providing a satisfying contrast with each bite.
-
Iced Tea: A tall glass of sweetened iced tea, perhaps with a slice of lemon, is an excellent drink pairing that refreshes the palate between bites. The light flavor complements the bright citrus notes in the Key Lime Bars.
-
Chocolate Drizzle: Add an unexpected pop by drizzling melted chocolate over your Key Lime Bars. This luscious finishing touch enhances the flavors and creates a stunning presentation on the plate.
How to Store and Freeze Key Lime Bars
- Room Temperature: Key Lime Bars can be stored at room temperature for up to 2 days, but be sure to keep them covered to maintain freshness.
- Fridge: To extend their life, refrigerate your Key Lime Bars for up to 1 week. Use an airtight container to prevent them from absorbing odors from the fridge.
- Freezer: You can freeze the bars for up to 3 months. Wrap them individually in plastic wrap and place them in a freezer-safe bag or container to keep them fresh.
- Reheating: Thaw frozen Key Lime Bars in the fridge overnight before serving. They are best enjoyed chilled or at room temperature, dusted with powdered sugar.
Key Lime Bars Variations
Feel free to let your creativity flow when making these delicious Key Lime Bars—each twist can elevate the experience!
-
Graham Cracker Crust: Swap the all-purpose flour crust for a mixture of crushed graham crackers, butter, and sugar for that classic Key Lime Pie taste.
-
Coconut Bliss: Add 100 g of shredded coconut to the crust for a tropical flair, giving each bite a creamy texture that complements the tangy lime.
-
Sweetened Condensed Milk: Replace half the granulated sugar in the filling with sweetened condensed milk for a richer taste, enhancing the certain creaminess in every bar.
-
Berry Burst: Fold in a cup of fresh berries like raspberries or blueberries into the filling for a splash of color and additional fruitiness that balances the lime’s tartness.
-
Chili Lime Heat: Add a pinch of cayenne pepper or chili powder to the filling to introduce a surprising kick that contrasts beautifully with the sweet citrus flavor.
-
Nutty Crunch: Incorporate finely chopped nuts, such as walnuts or pecans, into the crust to create a delightful crunch and complement the buttery base.
-
Zesty Lemon Lime Combo: Mix equal parts key lime juice and fresh lemon juice for a vibrant citrus explosion that brightens the flavor profile and is sure to please!
-
Herbal Infusion: Add a dash of fresh mint or basil to the filling for an aromatic twist that brings an exciting unexpected herbal note to the dessert.
Experimenting with these variations will not only personalize your Key Lime Bars but also create lasting memories during gatherings or simple family dinners!
Make Ahead Options
These Key Lime Bars are fantastic for meal prep, allowing you to whip up a delightful dessert even on your busiest days! You can prepare the crust up to 24 hours in advance; simply follow the initial steps, then cover and refrigerate it. The filling can also be whisked together and stored separately in an airtight container for up to 3 days in the fridge—this keeps the custard fresh and prevents it from setting too much. When you’re ready to serve, just pour the chilled filling over the pre-baked crust and bake as directed. This way, you’ll have luscious Key Lime Bars that are just as delicious but with significantly less stress involved!
Chef's Helpful Tips
- When making Key Lime Bars, always ensure your butter is properly softened to achieve the ideal creaming consistency, as this will help create a light and flaky crust.
- It’s essential to chill the crust before baking to prevent it from puffing up and maintaining a uniform shape.
- For the filling, use fresh key lime juice for the best flavor, and get the eggs to room temperature to ensure a smooth custard.
- Keep an eye on the baking time, as the filling should be set but still slightly jiggly in the center to achieve that perfect melt-in-your-mouth texture.
Key Lime Bars Recipe FAQs
How do I select ripe key limes?
When choosing key limes, look for ones that are slightly shiny and feel firm yet heavy for their size. Avoid any limes with dark spots or wrinkles as these can indicate overripeness. Ideally, they should be vibrant green and feel slightly soft when gently squeezed.
How should I store leftover Key Lime Bars?
To keep your Key Lime Bars fresh, store them in the refrigerator in an airtight container. They will stay delicious for up to a week. If you want to maintain their unique flavor, avoid storing them near strong-smelling foods, as they can absorb odors.
Can I freeze Key Lime Bars, and how do I do it?
Absolutely! Freezing Key Lime Bars is a great way to enjoy them later. First, let the bars cool completely, then cut them into squares. Wrap each piece tightly in plastic wrap, then place them in a freezer-safe container or bag. They can be frozen for up to 3 months. When you’re ready to enjoy them, just thaw them in the refrigerator overnight for the best texture.
What should I do if my filling doesn’t set properly?
If your Key Lime Bars filling doesn’t set, it’s often due to underbaking. The custard should be set but still slightly jiggly in the center when you take it out of the oven. If it underbakes, simply return it to the oven and bake for an additional 5-10 minutes, checking frequently to prevent overcooking.
Are Key Lime Bars suitable for allergies?
Key Lime Bars contain common allergens like eggs and gluten. If you’re catering to someone with dietary restrictions, consider using egg substitutes such as flaxseed meal or a commercial egg replacer. For a gluten-free version, swap regular flour for a gluten-free all-purpose blend. Just keep in mind that changes may affect the taste and texture slightly.
How can I enhance the flavor of my Key Lime Bars?
For an extra burst of flavor, I recommend adding more key lime zest to the filling or folding in some whipped egg whites for a lighter texture. You can also serve them with a dollop of whipped cream or a Curacao sauce for a delightful twist on this classic recipe. Enjoy experimenting!
Key Lime Bars
Ingredients
Equipment
Method
- Preheat your oven to 175°C (350°F) and line a 23×33 cm baking pan with parchment paper.
- In a mixing bowl, cream the softened butter for 2–3 minutes until light and fluffy, then add granulated sugar and all-purpose flour, mixing until well combined.
- Press the dough evenly into the bottom of the prepared pan. Chill in the refrigerator for 15 minutes, then bake for 15–20 minutes until lightly golden. Allow to cool completely.
- In a large bowl, whisk together eggs, granulated sugar, all-purpose flour, key lime juice, and zest until smooth.
- Pour the custard over the cooled crust and bake for 25–30 minutes until just set with a slight jiggle in the center. Cool completely in the pan.
- Refrigerate the bars until cold, dust with powdered sugar, slice into 16 bars, and serve.

Leave a Comment